- Go to http://blogs.ubc.ca/ and click on the CWL icon to log in.
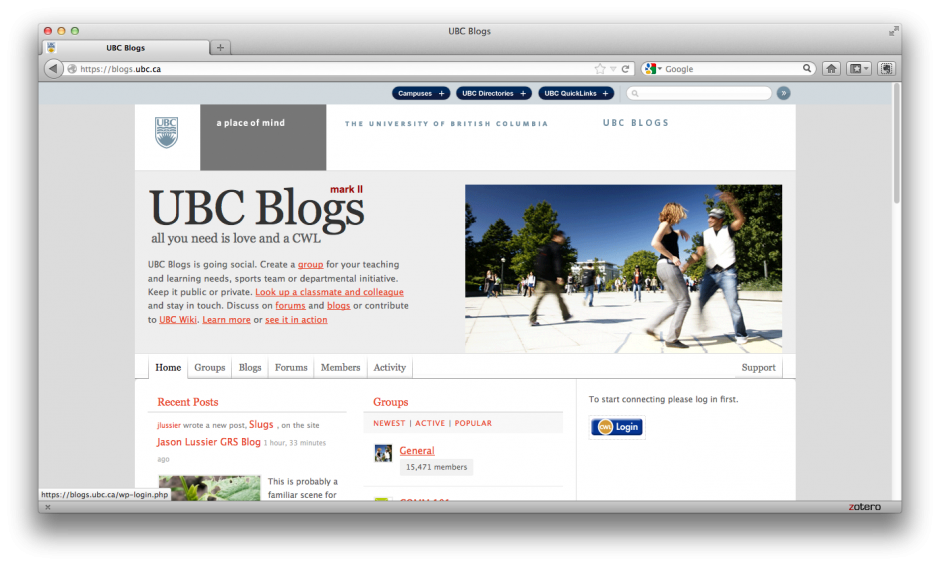
- You’ll be taken to the home page for UBC blogging. Halfway down the screen, below the header, is a menu. Select “Blogs”.
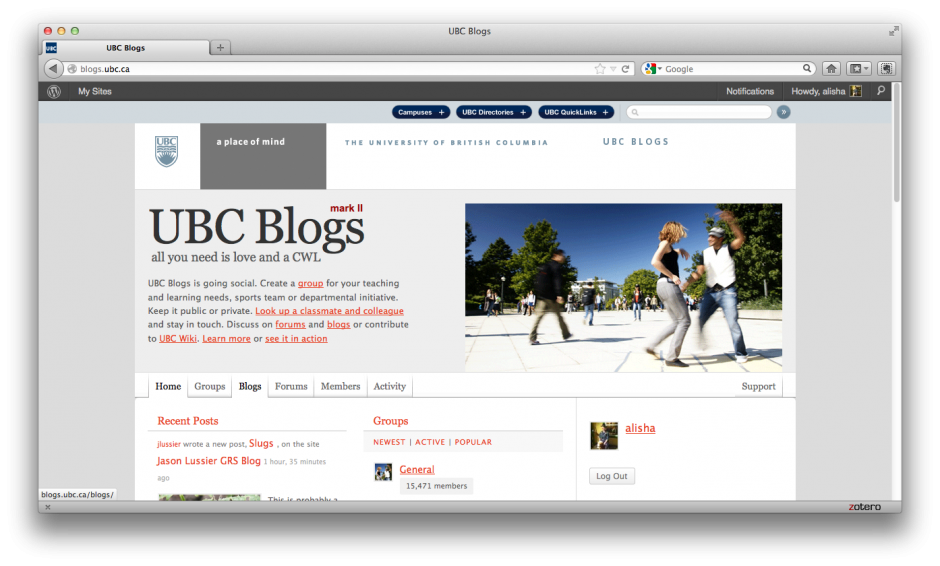
- This takes you to the Blogs Directory. The list you see is recent activity for all UBC blogs.
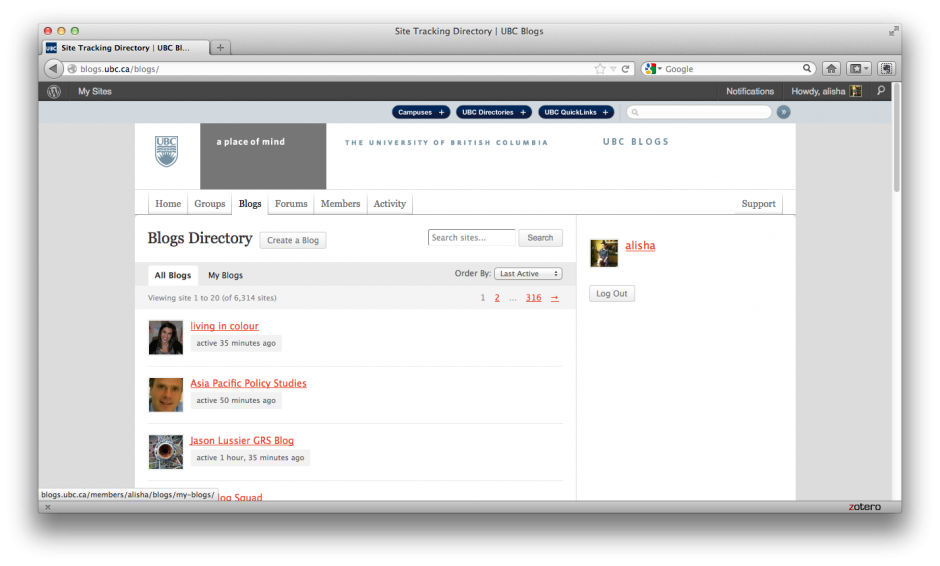
- Under the title “Blogs Directory”, there are two options: “All Blogs” and “My Blogs”. Select “My Blogs”. You’ll be taken to a list of all blogs you’ve ever made for UBC. If you’ve never made a UBC blog, the list will be blank.
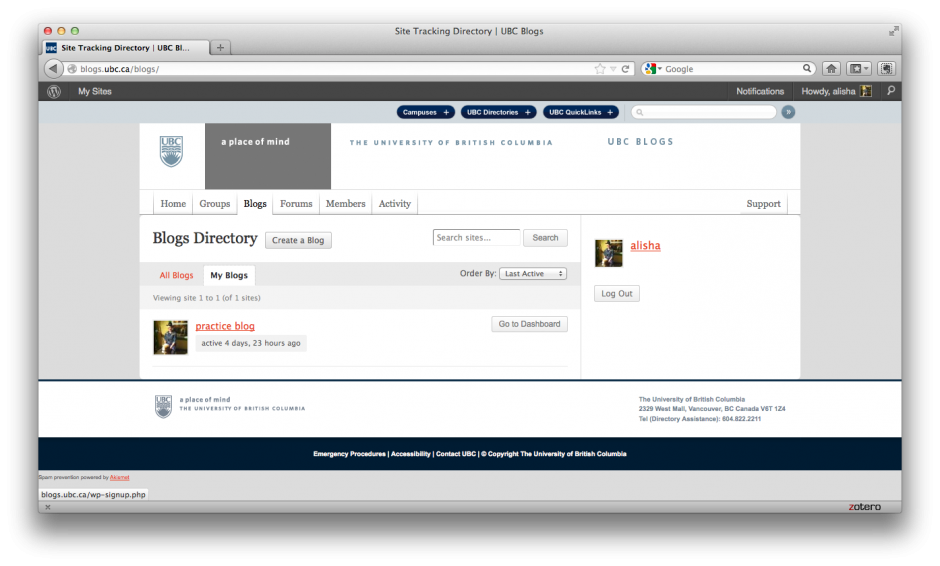
- Here comes the fun part! Next to the title “Blogs Directory” there is a link that says “Create a Blog”. Click on it.
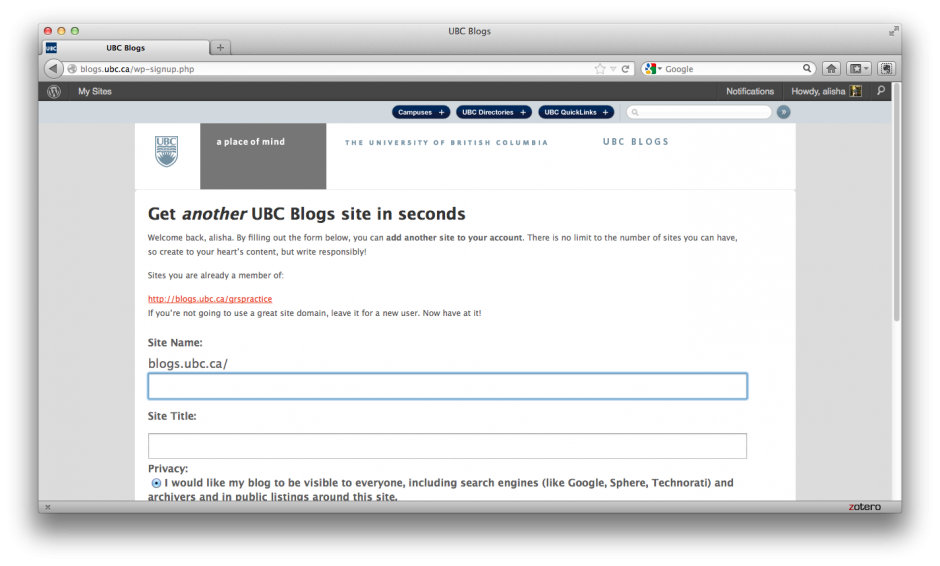
- Decide what you want your blog’s Site Name and Title to be. The Site Name, or URL, a bit like a physical address. It cannot be changed any more than you can change the address of a house. However, you can change the title in the future if you like.
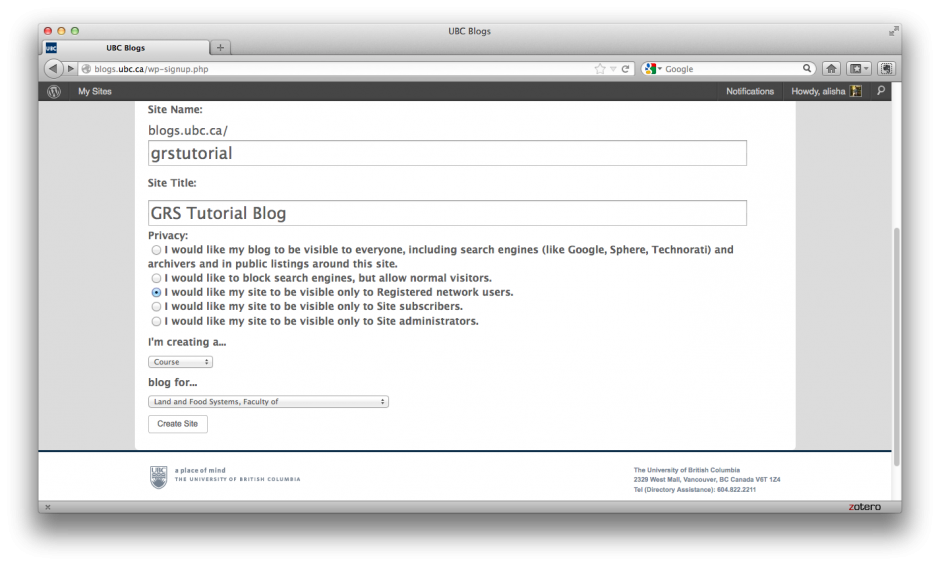
- Select which level of privacy you are comfortable with*. It very difficult to remove your blog from search engines once you’ve made it visible to them if you choose Option 1. Select the appropriate options from the remaining two boxes. Click Create Site.
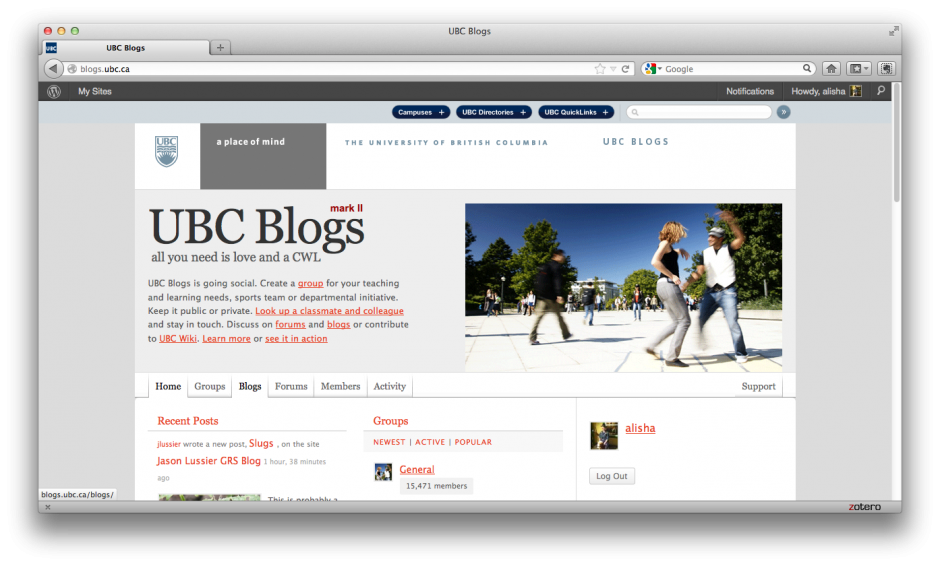
- You’ll be taken back to the UBC Blogs homepage. Navigate your way back to My Blogs using steps 3 and 4.
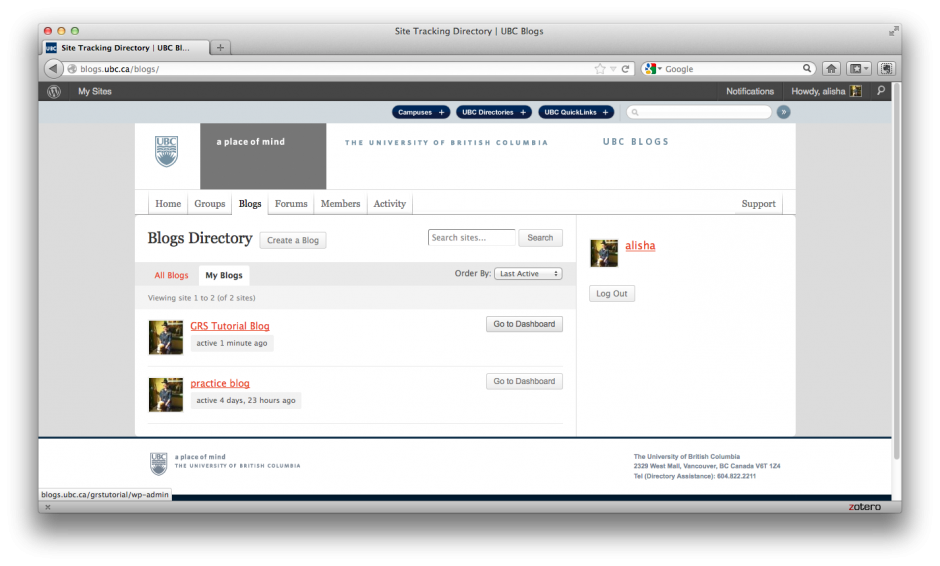
- To edit you new blog, click the link for “Go to Dashboard” next to the blog you want to work on.
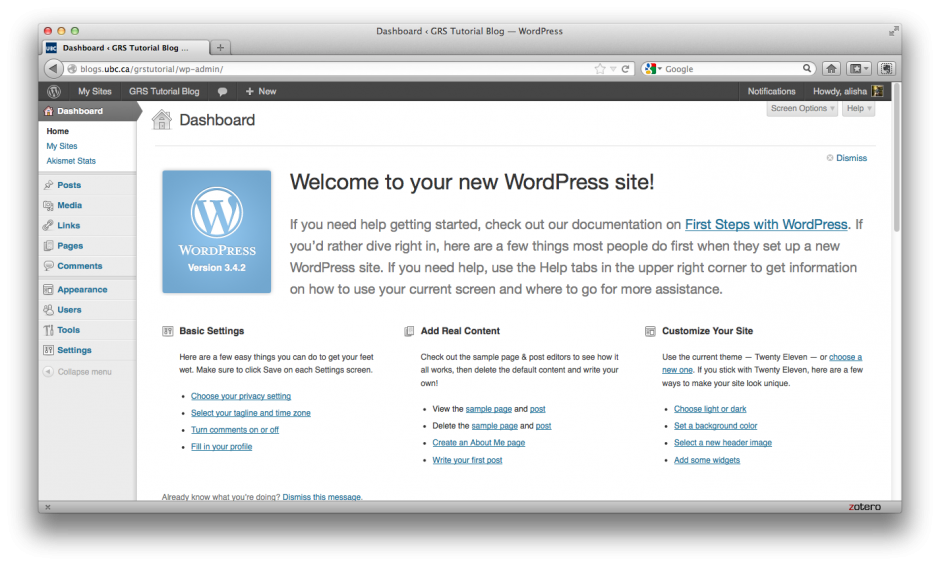
- Your dashboard is your blogging, editing, creating center. Note that the first time you use it the main page suggests some useful WordPress tutorials. Make use of these to get started. Once you have a blog set up, you must add some form of content in order for it to be complete. Instructions for that can be found here.
Create a UBC blog
September 26, 2012
Creating a UBC blog is fast and easy for UBC students. You do not need an invitation or a special password, just your CWL.
Step by step guide:
How to create blog if I am not a student of UBC?